Cisco C40 Telepresence System
Used in: DL1 (Columbia), Dow B-07, Dow 420, Luce 13 (Yale)
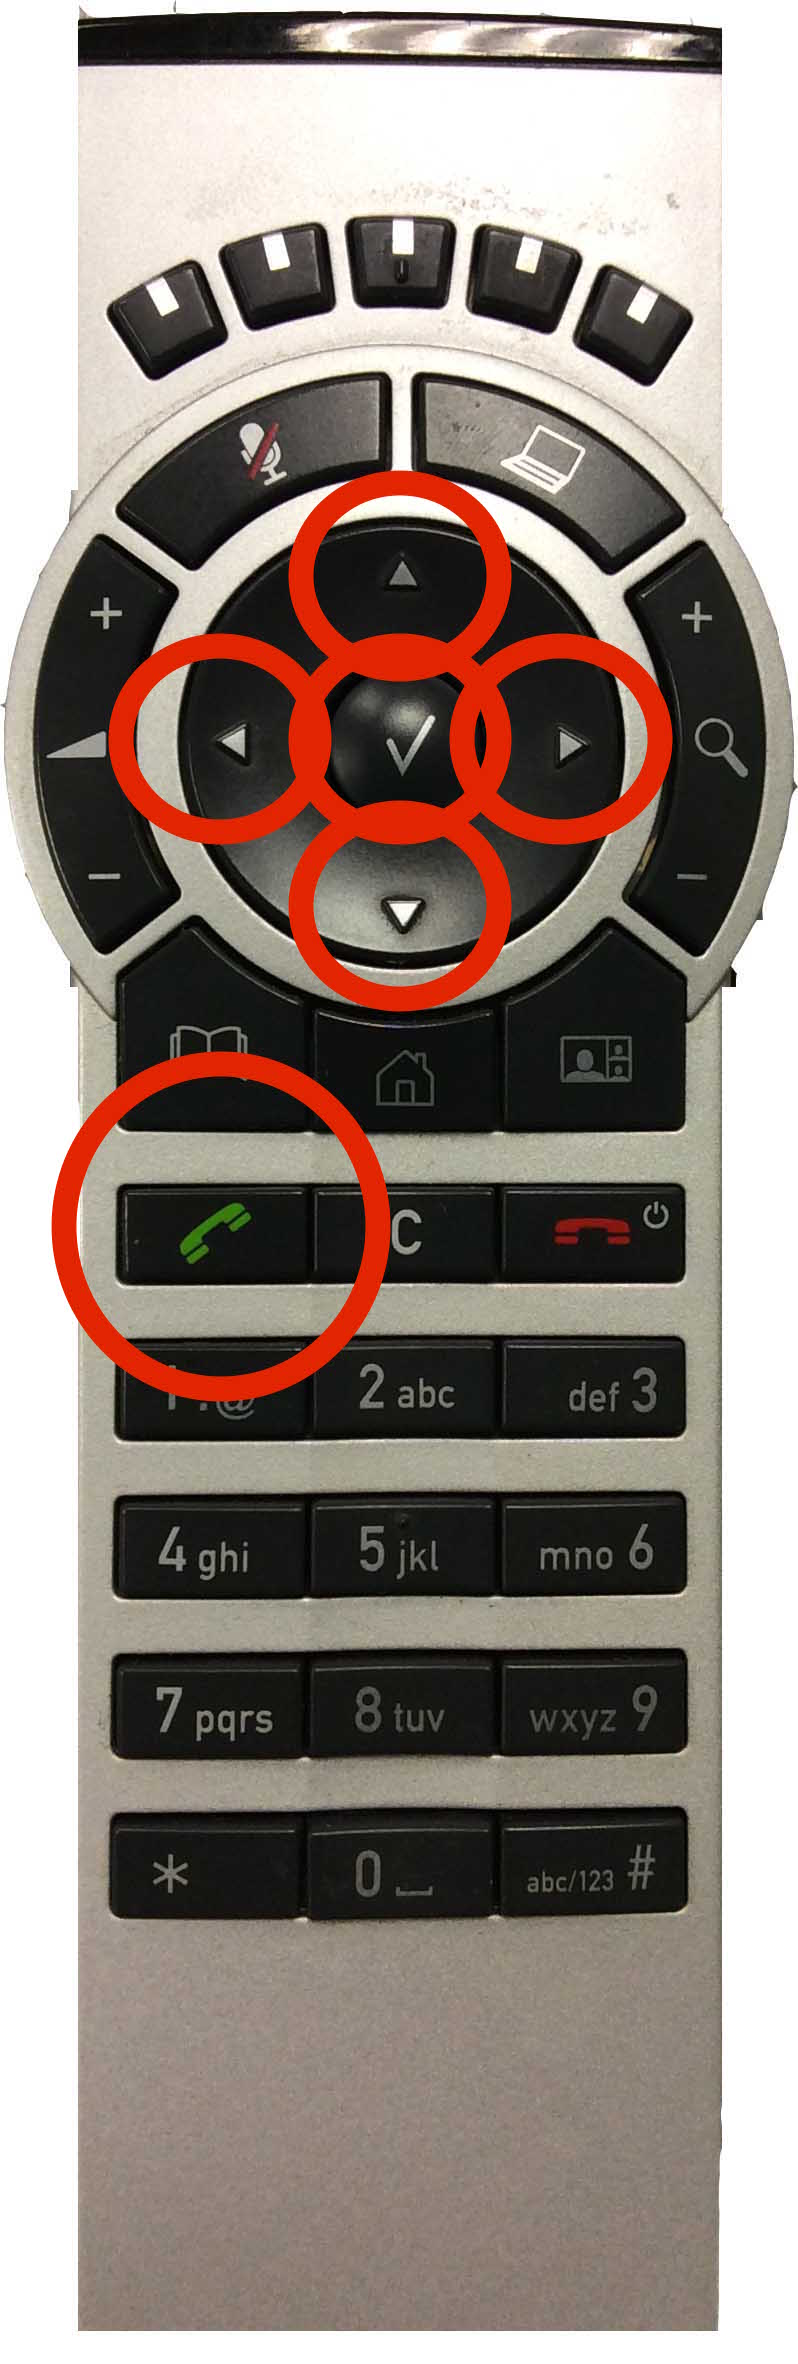
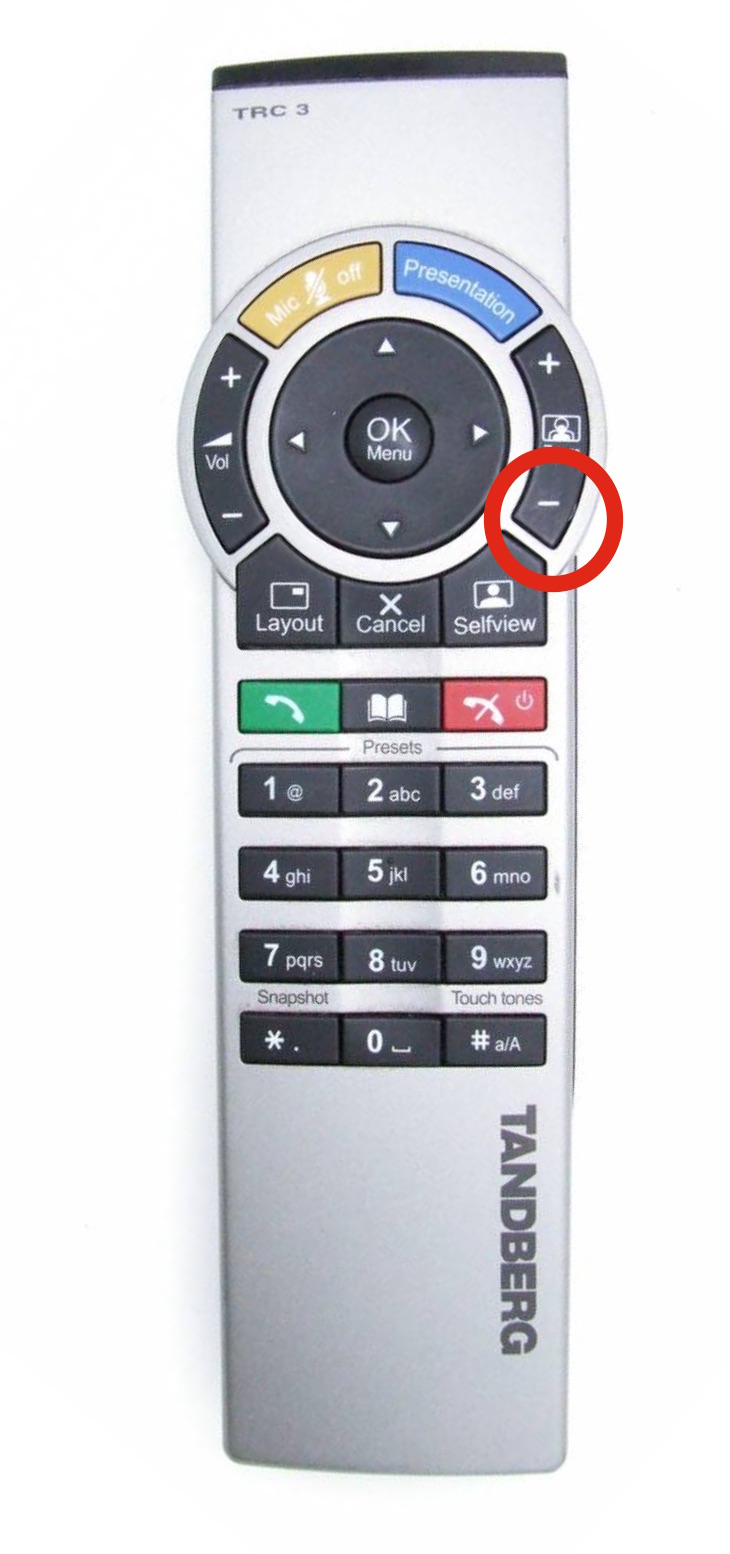
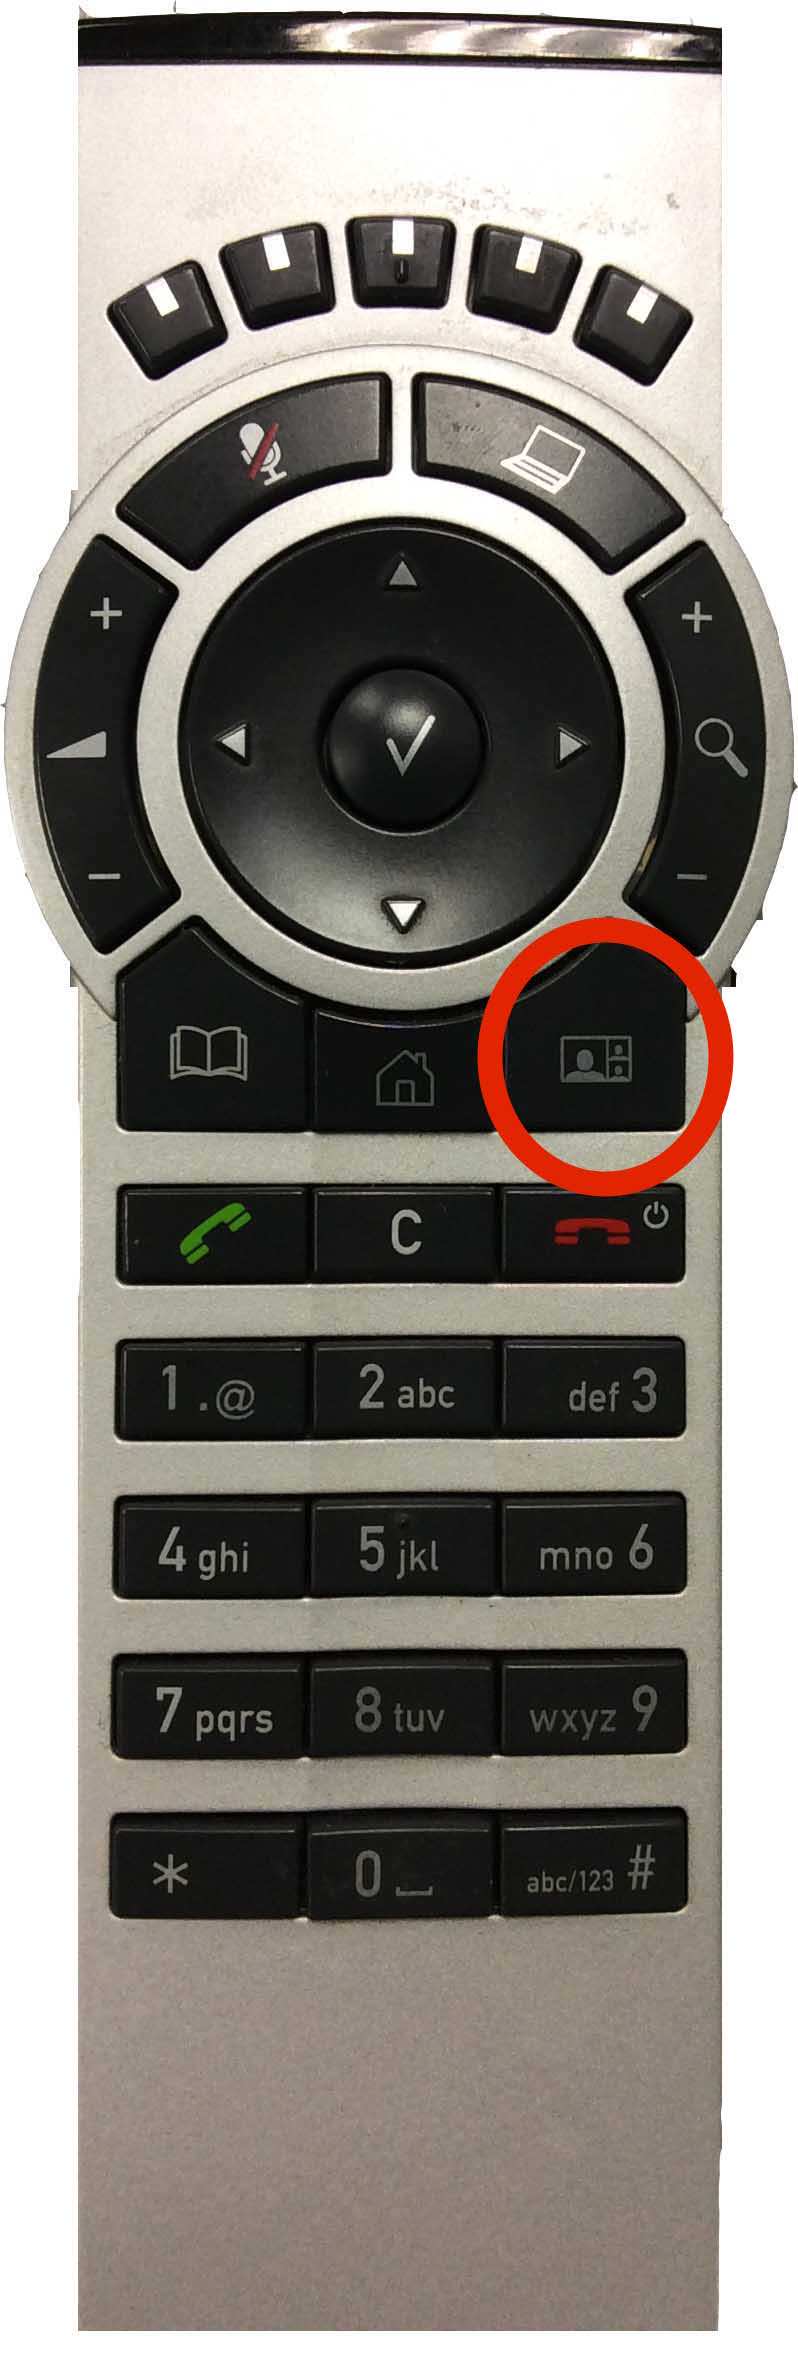
This codec requires the use of the Cisco remote. Take some time to review its major functions, because it is not intuitive at first. Once you master the use of the remote, you can make adjustments quickly and easily.
Classroom actions
1. Making calls
2. Sending the room computer content
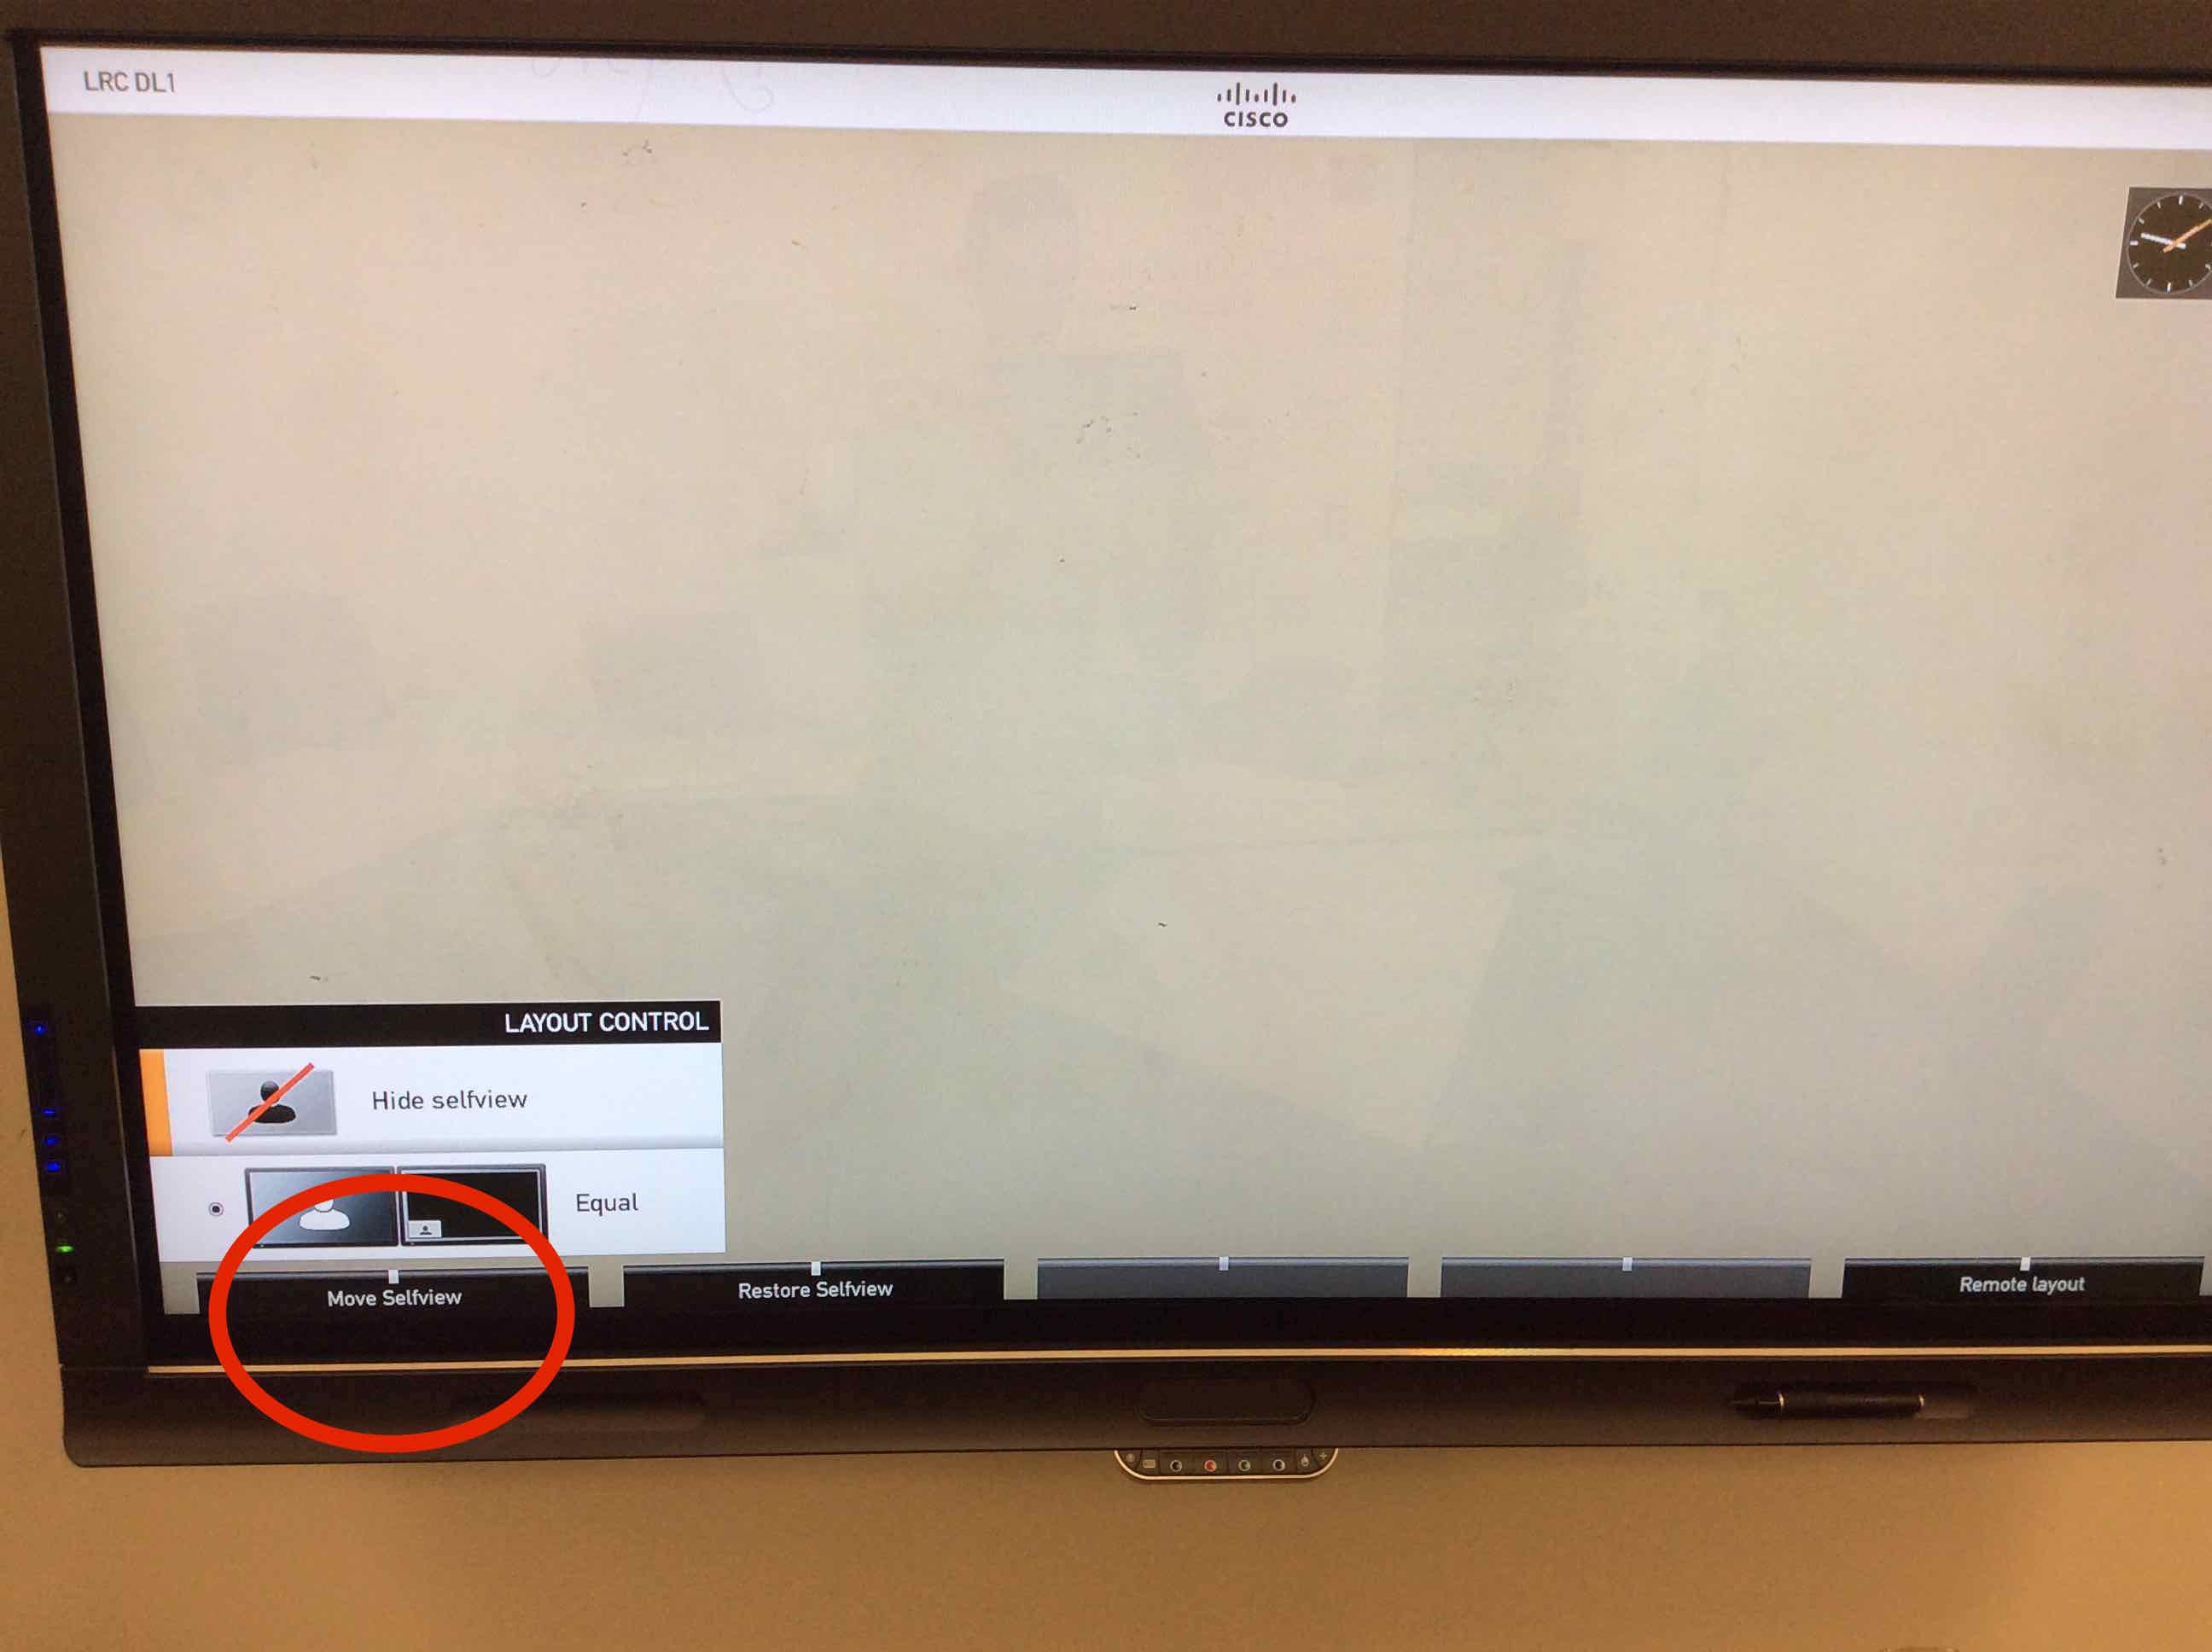
6. Moving the self view picture-in-picture
Making calls
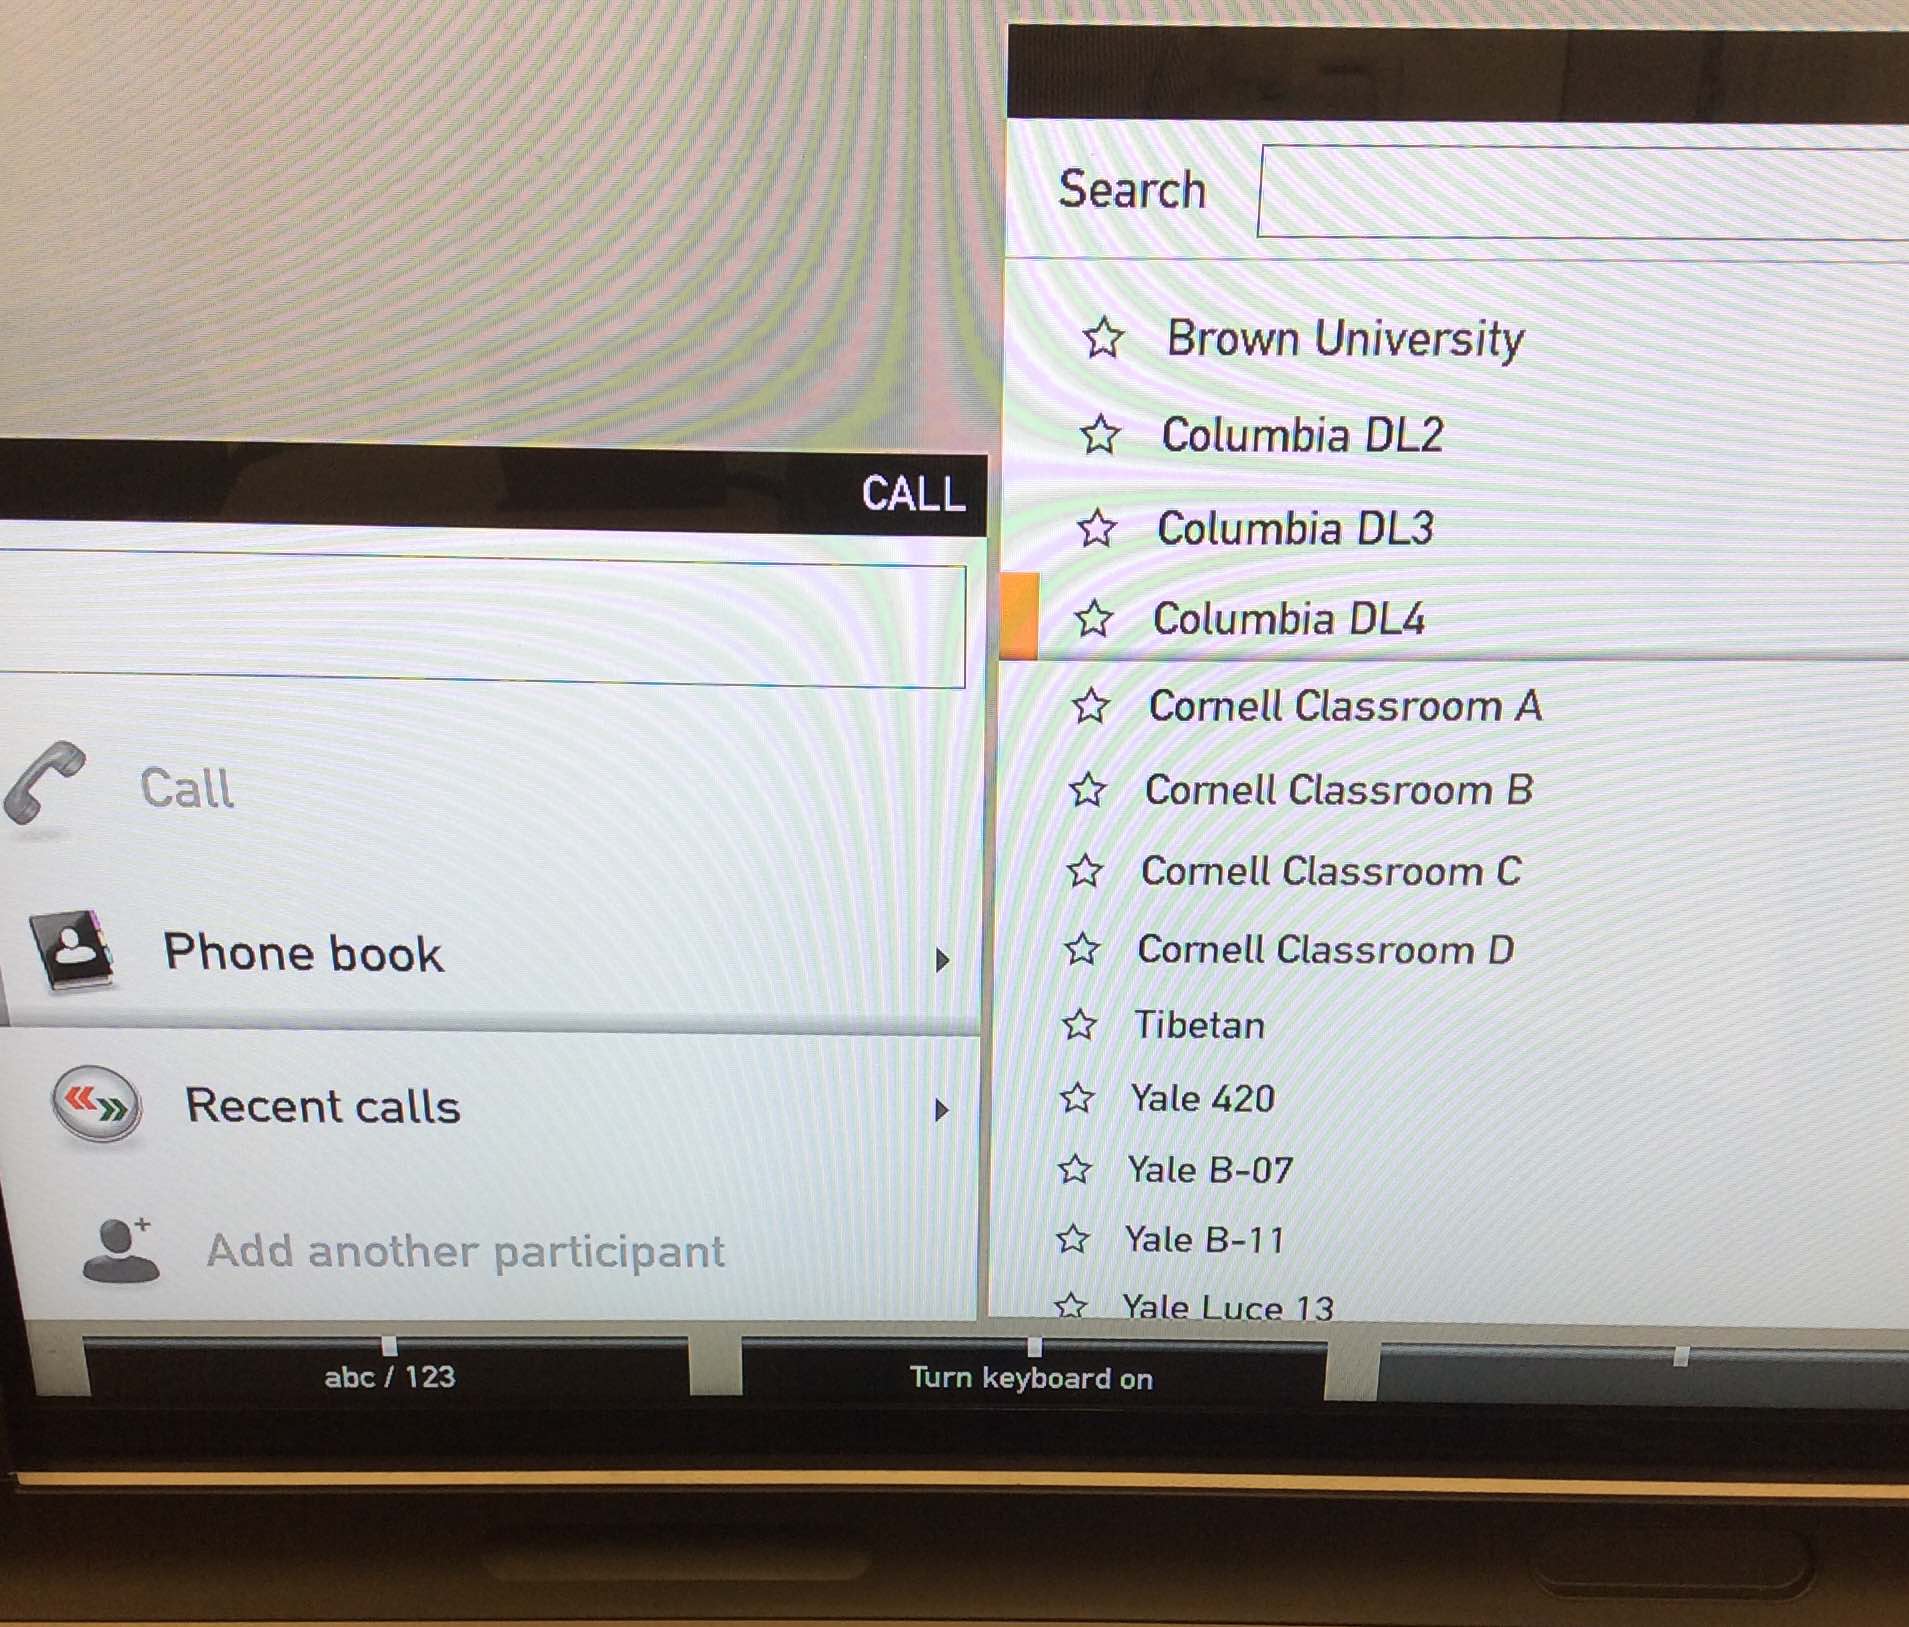
To make a call, press the button on the remote with the green telephone once, then use the arrow buttons to navigate to the name of the room you want to call. You can initiate the call by pressing the green telephone button again. When you want to end a call, you can press the red telephone button.
Sending the room computer content
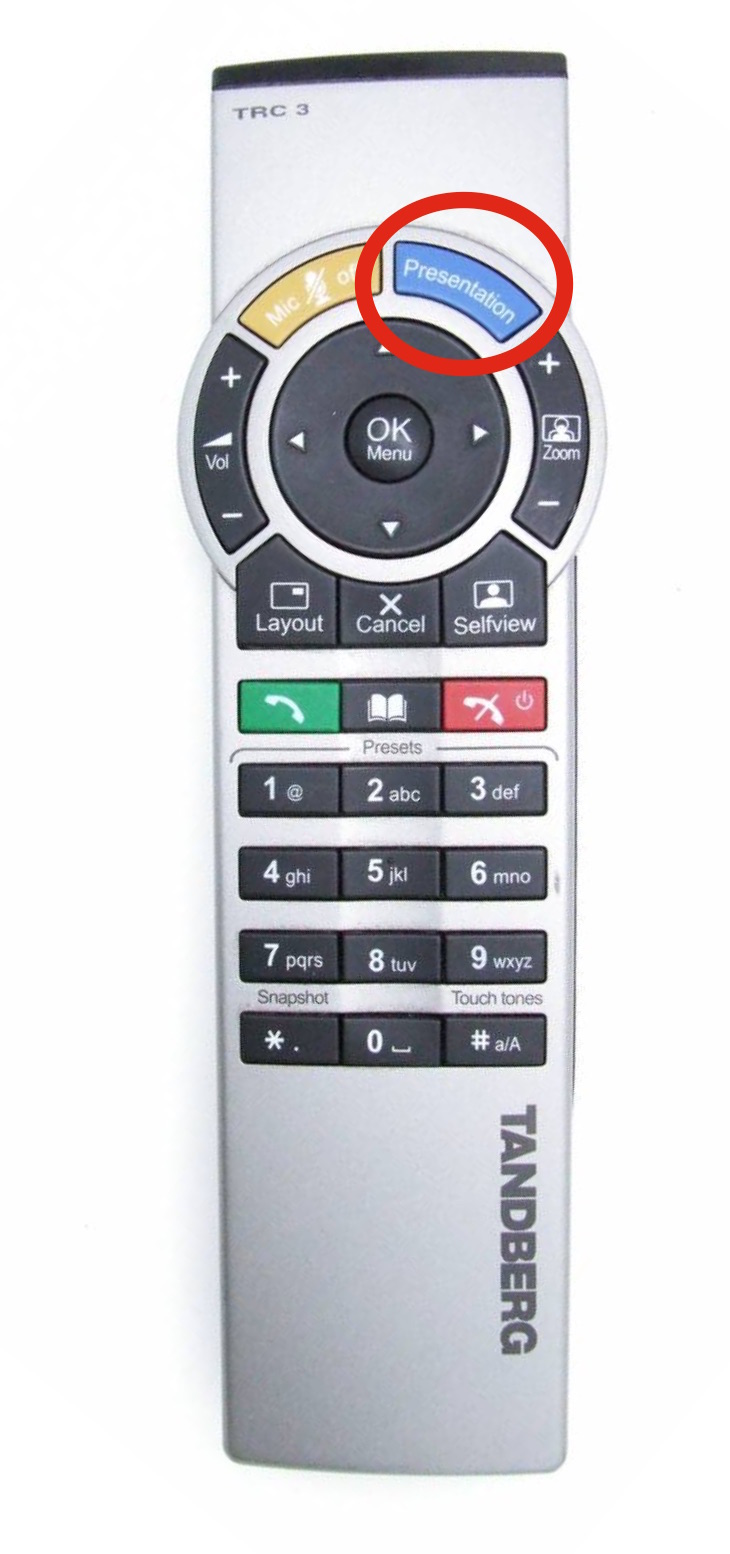
Press the “presentation” button, located near the top of the remote control. On some remotes, this is the button with the picture of a computer. On others this button just says “presentation.” If the room computer is not awake, you will need to move the mouse or press a key on the keyboard before you can see the computer content. When you want to stop presenting, perhaps to see the image of the remote classroom(s) better, you can press the presentation button again.

Moving your camera
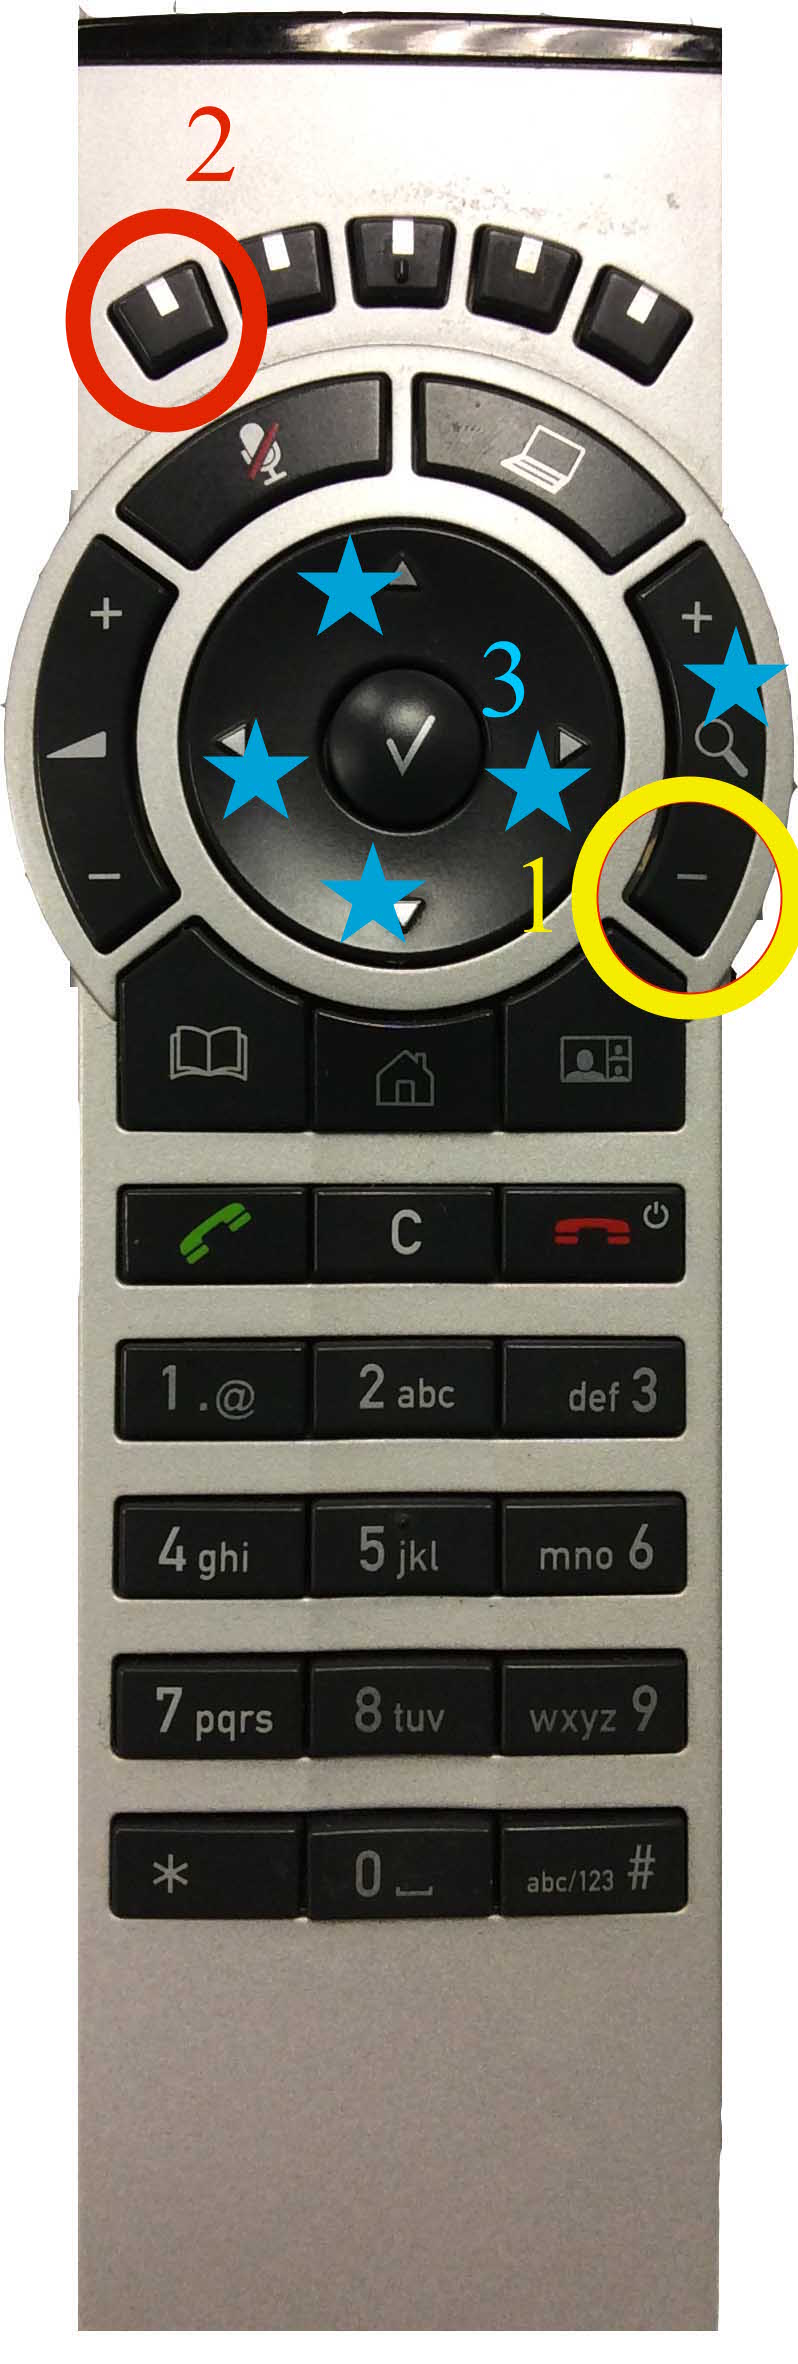
It is important for you to be centered on the screen and sufficiently zoomed in so that the class participants at the other site can see you well, get a sense of your emotions, and pick up on your facial expressions and body language. To move your camera, first tap the “zoom” button (magnifying glass button) once. This lets the codec know that you want to use the camera. Then, use the arrow buttons and the zoom button to change the camera’s position.

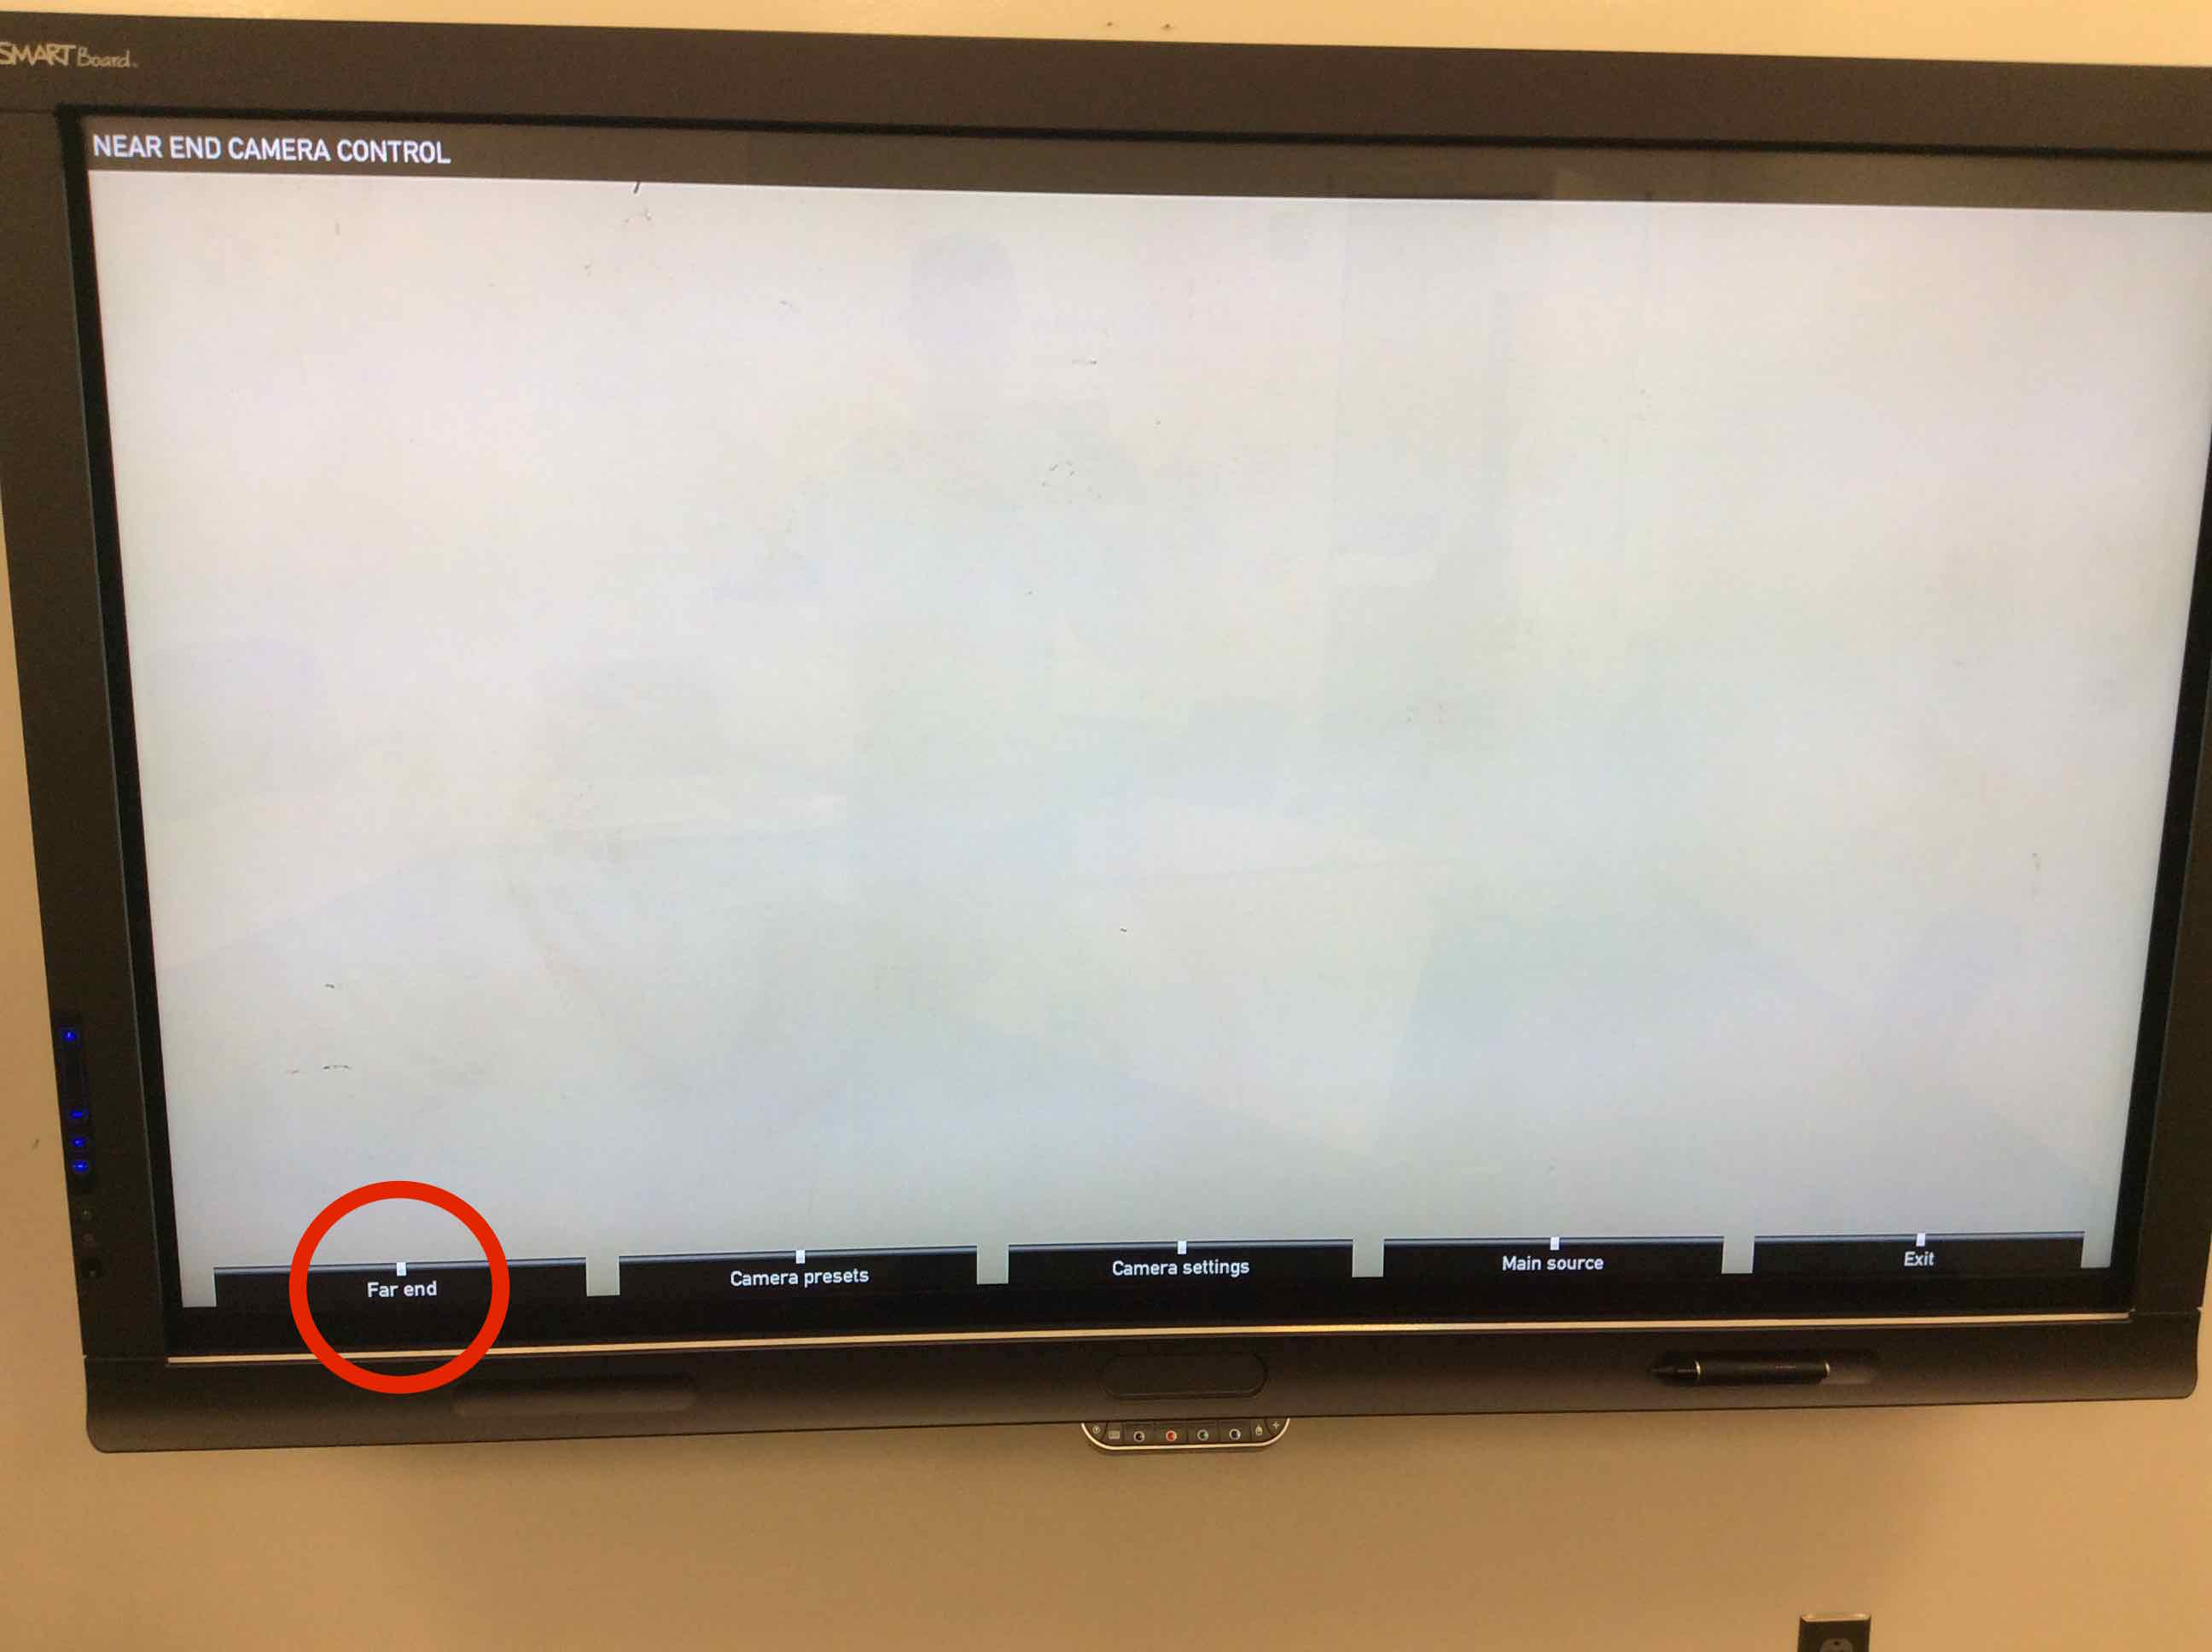
Moving the far end camera
This is an important classroom action that all students should know how to do. Students without the teacher in the room should do this frequently, so that the teacher can attend to other classroom issues.
First press the Zoom (magnifying glass) button. Then, press the unmarked button on the top left, which corresponds to the tab that appears at the bottom of the screen labeled “far end.” You have now selected to control the far end camera, and you can manipulate it with the arrow buttons and the zoom button.
Adjusting the layout on your screen
You can choose the relative size of the various video streams on your display. These include the video of the remote classroom(s) and the computer content (either your own, or the content you are receiving from a remote site.
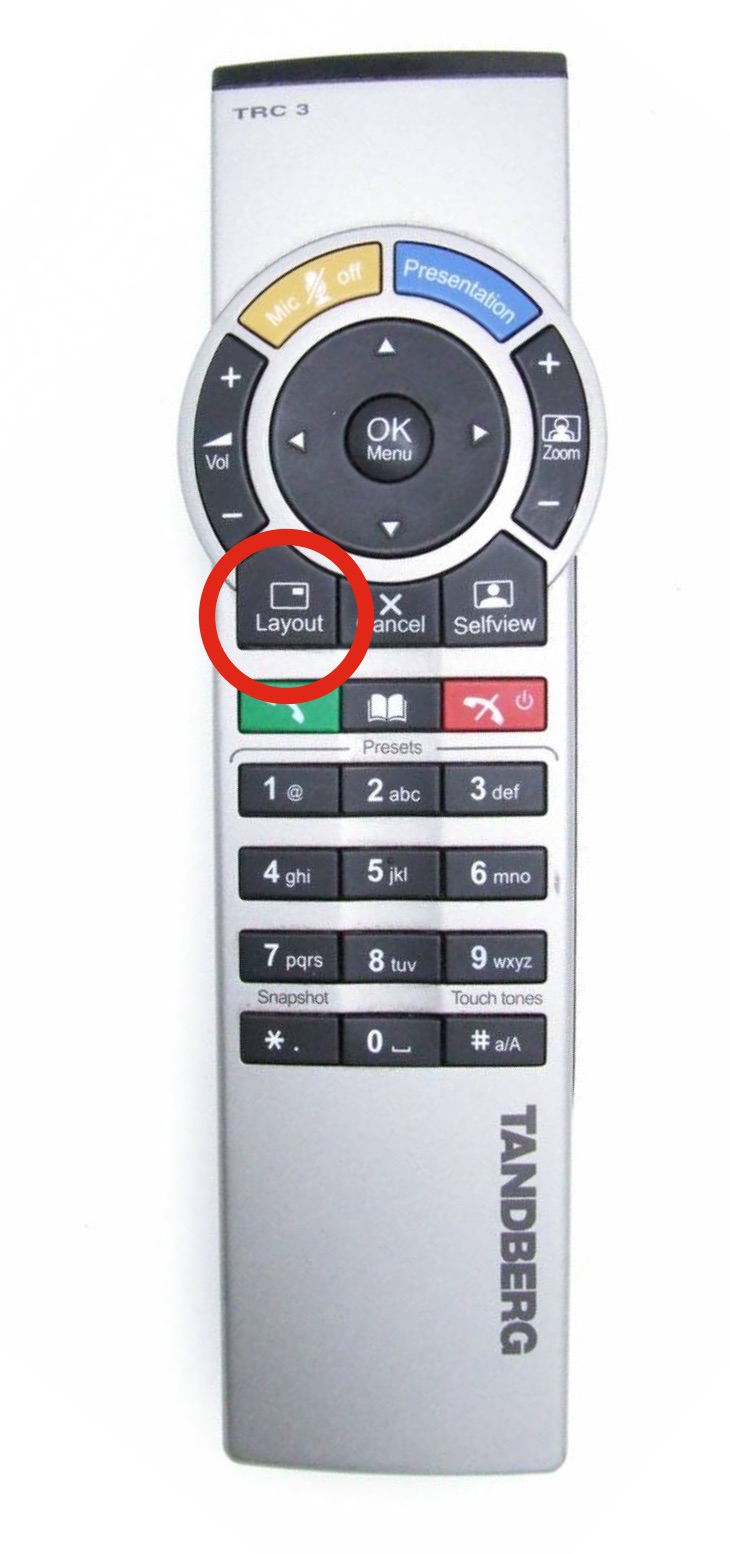
To make this adjustment, press the layout button, which is located near the middle of the remote control, and is either labeled “Layout” or has an icon of a small person in a screen.
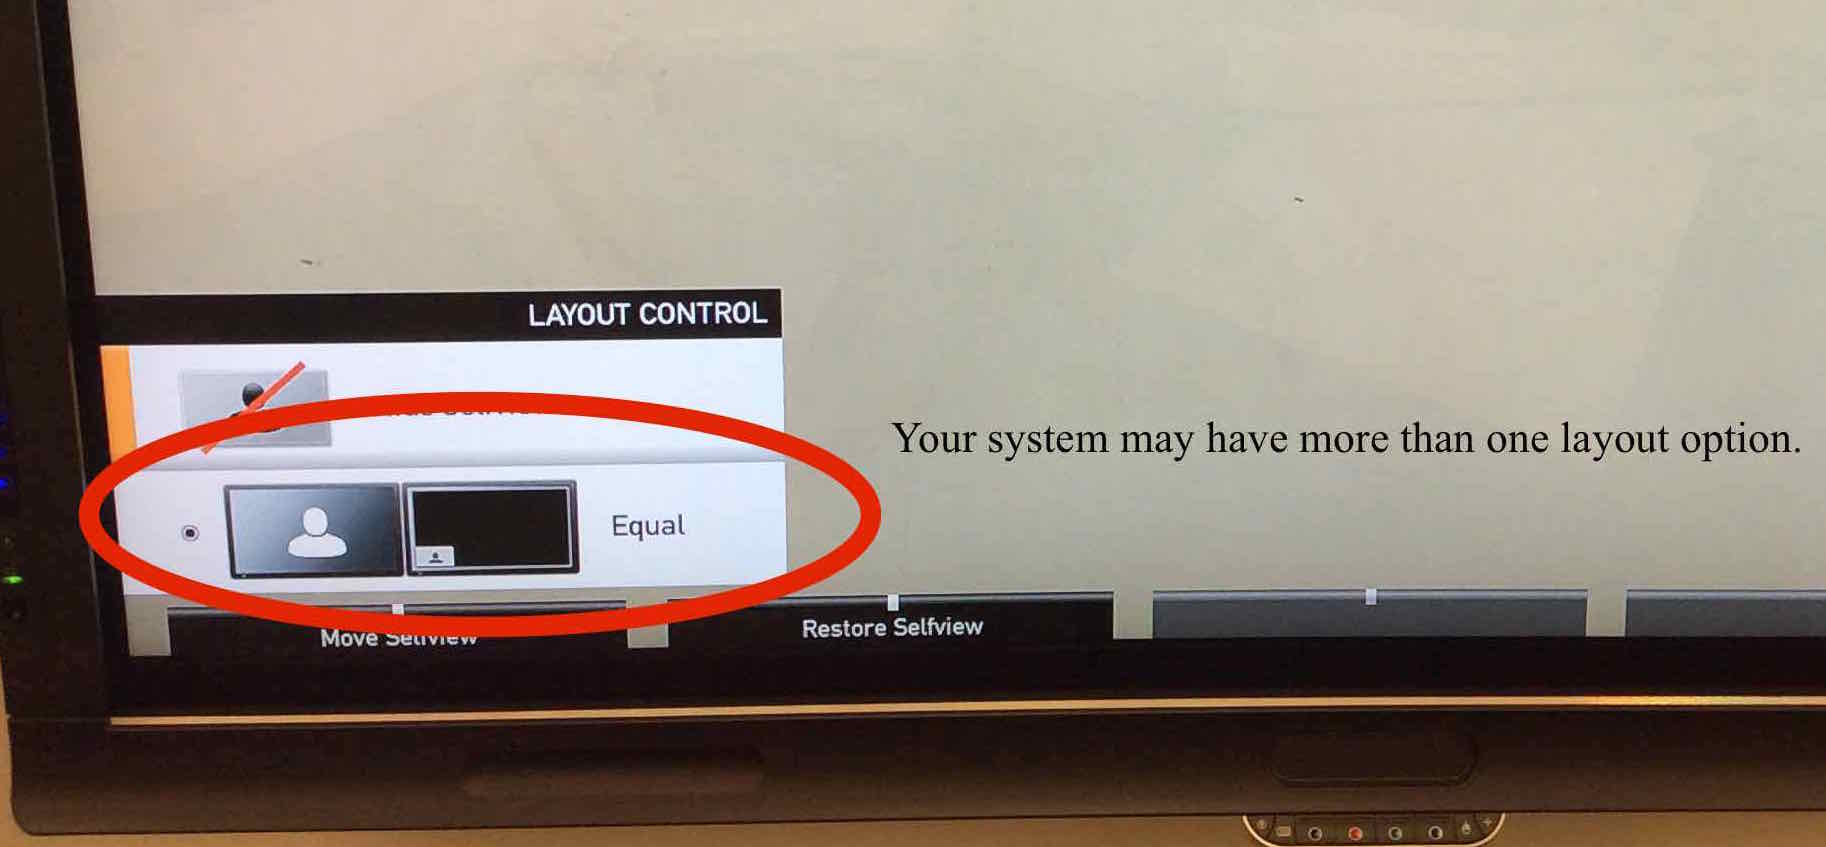
Moving the self view
Sometimes the self-view can cover an important part of the image on your screen. One solution to this problem is to move either your camera or the remote camera. Another possibility is to move this screen. You can do so by pressing the layout button, then selecting “move self view” from the layout menu on the screen, which corresponds to the first unmarked button on the top left of the remote control.